
|
Home
| pfodApps/pfodDevices
| WebStringTemplates
| Java/J2EE
| Unix
| Torches
| Superannuation
|
| About
Us
|
|
|
Arduino for Beginners, controlled by Android
|
by Matthew Ford 7th April 2014
©
Forward Computing and Control Pty. Ltd. NSW Australia
All rights
reserved.
This page shows how you can switch an Arduino output on and off from your Android mobile with just one click on the pfodApp icon. Add a relay driven by this output to switch the real hardware. No Android coding is required. Simple text strings in the Arduino code control everything.
There are other apps that allow you to switch an output on and off. What makes pfodApp different is that the Arduino code feeds back a status message to your mobile to tell you the output state, on or off. The exact form of this message is completely controlled by the text in your Arduino code (see below).
The other things that make pfodApp different are:- you can easily add extra devices to control, you can easily add multi-level menus if your devices need them and you can connect via either bluetooth or wifi/internet, and wifi/internet connection offers the option of 128bit security against hackers taking control of your device. You can also send debugging messages and display plot data in real time.
See Android controlled Lights and Power for an project controlling 4 relays and check out www.pfod.com.au for other uses such as controlling a robotic lawnmower or knight rider lights. None if these projects require any Android programming. The same pfodApp does them all, controlled by simple text strings in the micro (Arduino or other) code.
This project depends on two new features on pfodApp:-
Single Click Connection in V1.2.22+ and Close Connection message in
V1.2.20+
The Single Click Connection feature means that if only
one connection is defined, then when you start pfodApp it will
automagically connect to that device.
The Close Connection
message, {! … }, is the message the pfodDevice (Arduino) sends
back to the pfodApp when it wants the pfodApp to close. When the
pfodApp closes in response to this message, the app will display to
the user the text sent back in the close message.
If you have an earlier version of pfodApp (<V1.2.21) then update to the latest version to get these new features.
This project uses the same parts as Arduino for Beginners, controlled by Android. Follow the instructions on that page to assemble the micro (Arduino), bluetooth module and led/resistor (as shown below).
This project will turn the Arduino digital output D3 on and off. A led will be driven, via a resistor, from this output. To control real hardware just drive a relay from this output instead. The Arduino code use here is minimal. See www.pfod.com.au for other projects with menu systems.


Here is the complete sketch. This
version lets you turn the Led on and off from your mobile with a
single click.
The sketch
source is here, copy and paste it into the IDE and load it on to
you Uno board.
You
also need to download the pfodParser
library zip file and follow the instructions there for installing
it.
NOTE:
remove the bluetooth shield before uploading the sketch because the
bluetooth shield uses the same pins the USB connection does and the
programming get confused.
#include <EEPROM.h> // include the EEPROM library
#include <pfodParser.h> // include the library
pfodParser parser; // create the cmd parser
// Pin 3 if the output being switched.
// give it a name:
int switchedOutput = 3;
// the setup routine runs once when you press reset:
void setup() {
  Serial.begin(9600);
  for (int i=3; i>0; i--) {
    // wait a few secs to see if we are being programmed
    delay(1000);
  }
  // initialize the digital pin as an output.
  pinMode(switchedOutput, OUTPUT);
  digitalWrite(switchedOutput, LOW); // start with output low (off)
}
// the loop routine runs over and over again forever:
void loop() {
  byte in = 0;
  byte cmd = 0;
  if (Serial.available()) {
    in = Serial.read(); // read the next char
    cmd = parser.parse(in); // pass it to the parser returns non-zero when a command is fully parsed
    if (cmd != 0) { // have parsed a complete msg { to }
      if ('.' == cmd) {
        // pfodApp has connected and sent {.} it is asking for the main menu
        // toggle the output and send back Close Connection message with current state of output
        // either {!Output OFF}  or {!Output ON}
        Serial.print(F("{!")); // send start of close connection message
        boolean outputState = digitalRead(switchedOutput);
        if (outputState == LOW) {
          digitalWrite(switchedOutput, HIGH); // was off turn on
          Serial.print(F("Output is ON")); // change this to your own message
        } else {
          digitalWrite(switchedOutput, LOW); // was on turn off
          Serial.print(F("Output is OFF")); // change this to your own message
        }
        Serial.print(F("}")); // send closing } to complete pfod message,  pfodApp will exit and display your message
        // you can add any code here that is needed to close the connection on the micro side.
        // nothing for the ITead Studio BT Shield
      }
    }
    cmd = 0; // have processed this cmd now
    // so clear it and wait for next one
  } // else no serial chars just loop
}
Note: in the code above all the strings are enclosed with F(“ “) This macro makes sure the strings are placed in the program FLASH where you have much more room. (See What fails when you add lots of Strings to your Arduino program.)
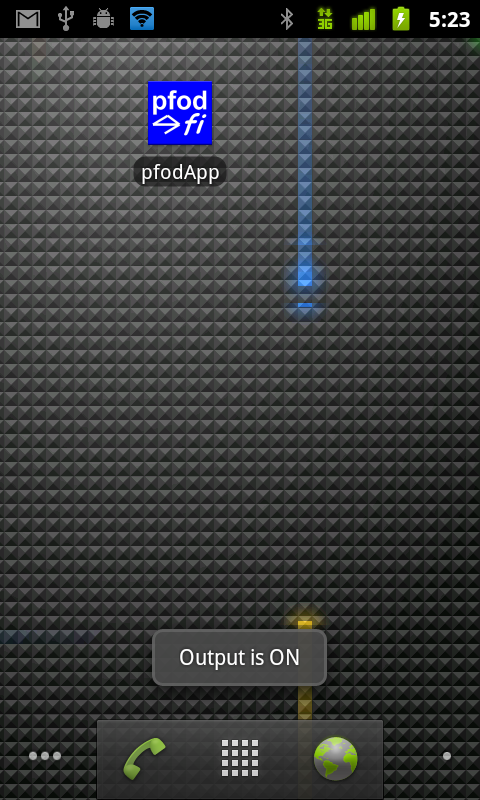
Install pfodApp on your mobile and set up a connection to your bluetooth shield as described in the pfodAppForAndroidGettingStarted.pdf. I called my connection Uno, then exit the pfodApp. Then when you next click on pfodApp icon,

it
will automatically connect to the only connection it knows about, Uno

and
the Arduino sketch will toggle the output state and send back to
Close Connection message with the current state. This causes the
pfodApp to exit and display the message. See
the pfod Specification for
the details and examples of all the pfod messages and their formats.
For many uses, driving a relay from this output, D3, to switch some hardware on and off, is all that is required.
However the pfodApp can do much more. See How to switch an Arduino output on and off from your Android mobile for an simple example of how to use a menu to control relays and how to debug your sketch via your Android mobile. See Android controlled Lights and Power. pfodDevice for Arduino for a 4 relay example.
To learn more about pfod check out
the pfod Specification and
all the projects on www.pfod.com.au
AndroidTM is a trademark of Google Inc. For use of the Arduino name see http://arduino.cc/en/Main/FAQ
The General Purpose Android/Arduino Control App.
pfodDevice™ and pfodApp™ are trade marks of Forward Computing and Control Pty. Ltd.

Contact Forward Computing and Control by
©Copyright 1996-2020 Forward Computing and Control Pty. Ltd.
ACN 003 669 994